Managing Projects in the GUI
A project is a saved setup that tells Griptape Nodes where your files go and which libraries and engine version to use. Switching to a project changes that context for everything you do: where rendered images and downloads are saved, which workflows show up, and which node libraries are available.
This page walks through every project task you can do from the GUI: switching between projects, creating new ones, viewing and editing them, and removing them. For the concepts behind projects (the file format, macros, version pinning), see the Project overview.
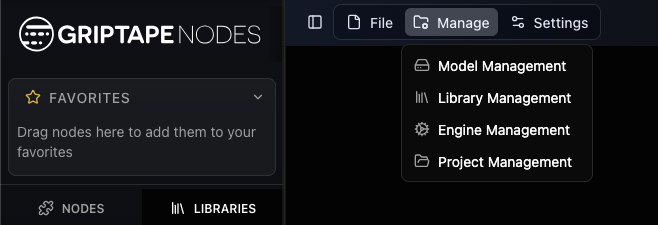
Everything on this page happens inside the Project Management window. Open it from the top menu bar: Manage → Project Management.
The Project Management window
The Project Management window opens on the project list. Projects are shown as a tree: a child project appears nested under its parent. The project you're currently in is marked with an Active badge.
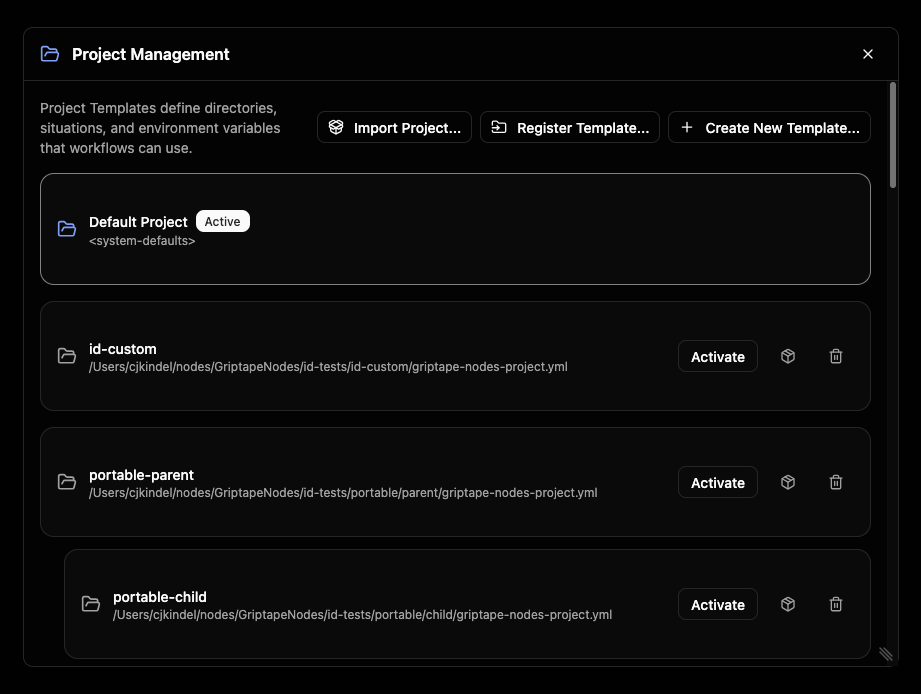
Two buttons in the top-right corner add projects to this list:
- Register Template…: point at a project file that already exists on disk and add it to the list.
- Create New Template…: make a brand-new project from scratch.
Click any project in the list to open its detail view, where you can review and edit it.
Switching projects
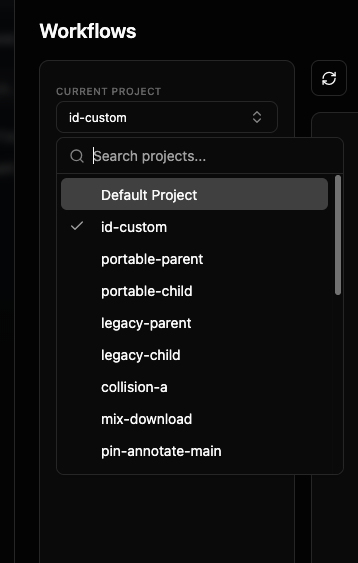
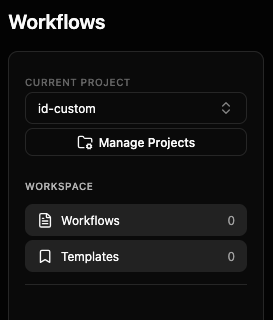
Switching is the most common thing you'll do. You can switch from the Project Management window (click a project, then Activate), but the quickest way is the project picker in the workflow chooser.
The picker shows the project you're currently in. Open it to search the list and pick another; a checkmark marks the active one.
When you choose a different project, Griptape Nodes asks you to confirm. The dialog shows which project you're leaving and which you're moving to.
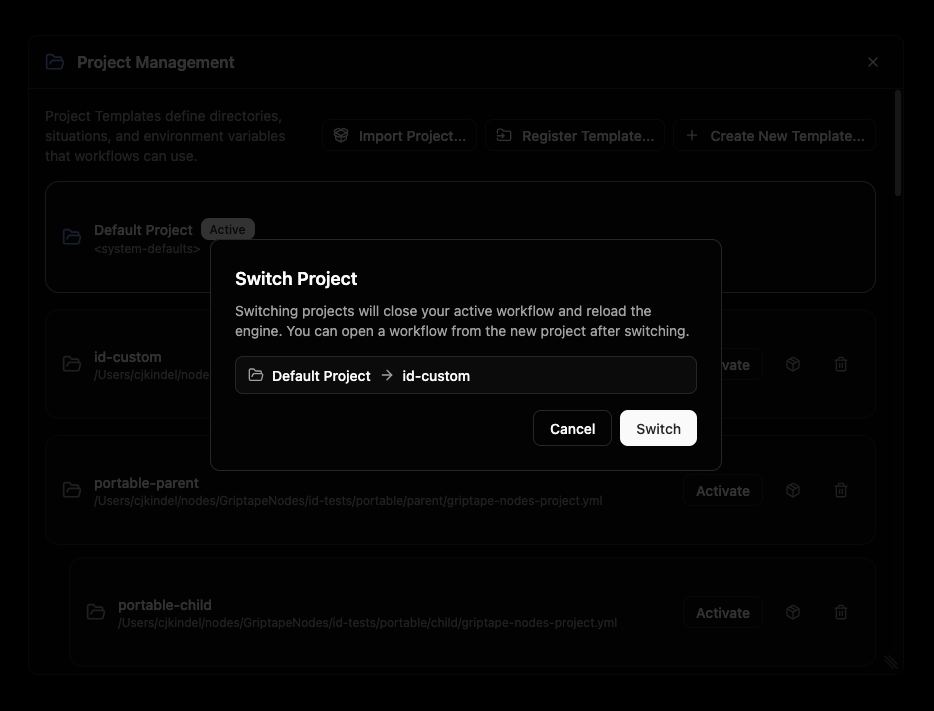
Switching reloads the engine. Your active workflow is closed first (you'll be prompted to save if you have unsaved changes), and the workflow list refreshes to show the new project's workflows. After switching, open a workflow from the new project to keep working.
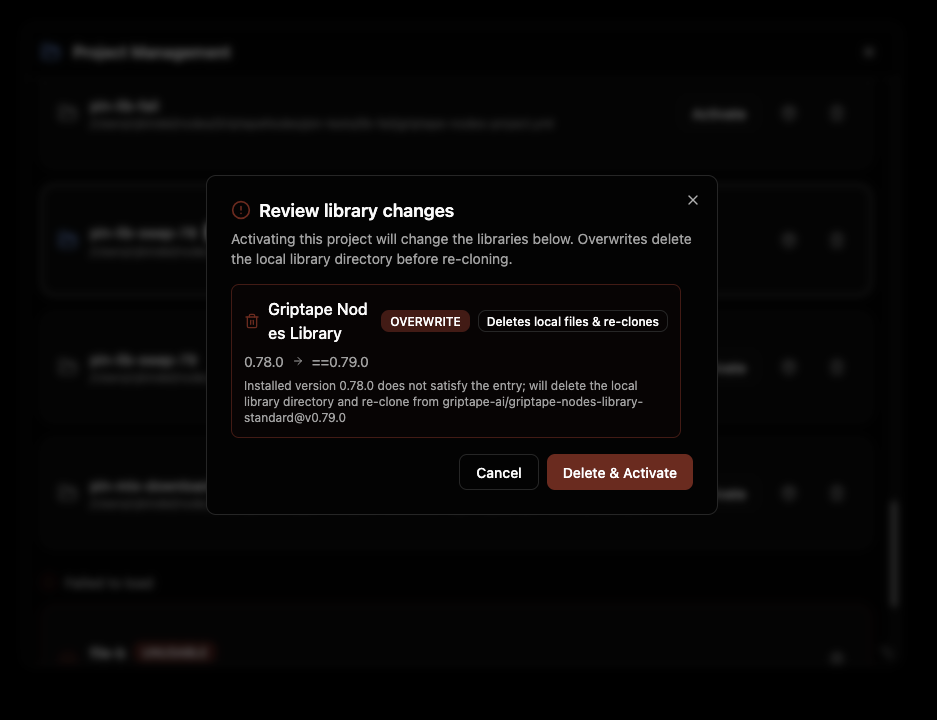
If the project you're switching to pins specific library versions, a provisioning preview appears first so you can review (and approve) any libraries that will be installed or changed before the switch happens.
A progress indicator reads Switching to

Creating a project
Click Create New Template… to open the New Project Template dialog. For most projects you only need to fill in a name; everything else has a sensible default.
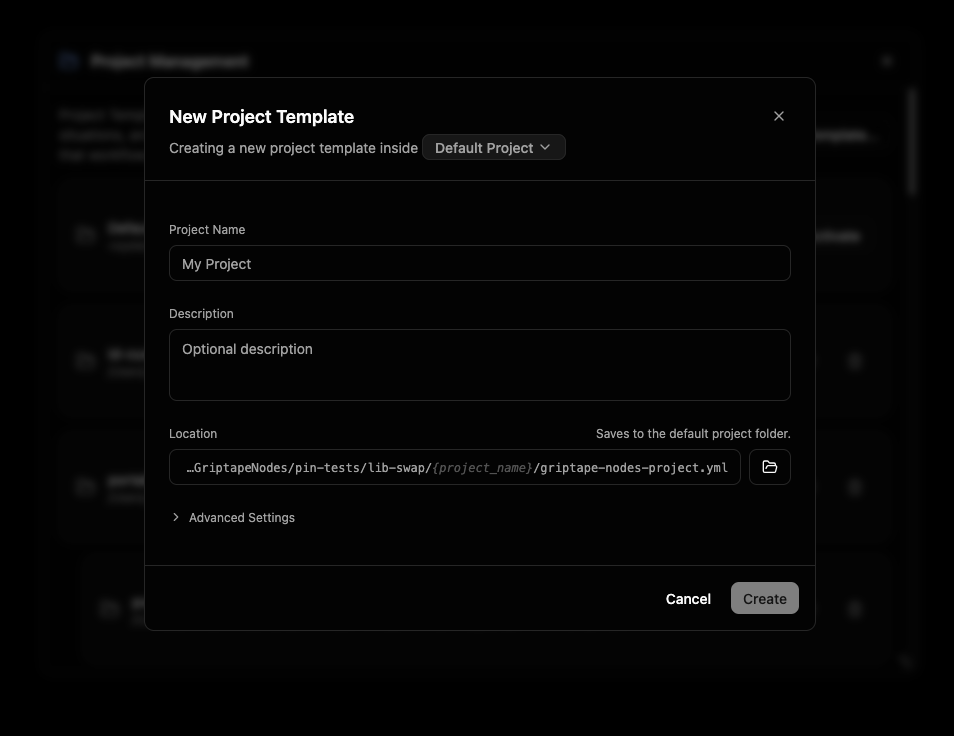
The subtitle at the top reads "Creating a new project template inside Default Project." That highlighted name is the location: a picker for which project's folder the new project is saved into. It defaults to your active project (or the Default Project). Click it to choose a different one.
Fill in the basics:
- Project Name: the human-readable name shown everywhere in the GUI. This is the only required field.
- Description: an optional note describing what the project is for.
- Location: where the project file (
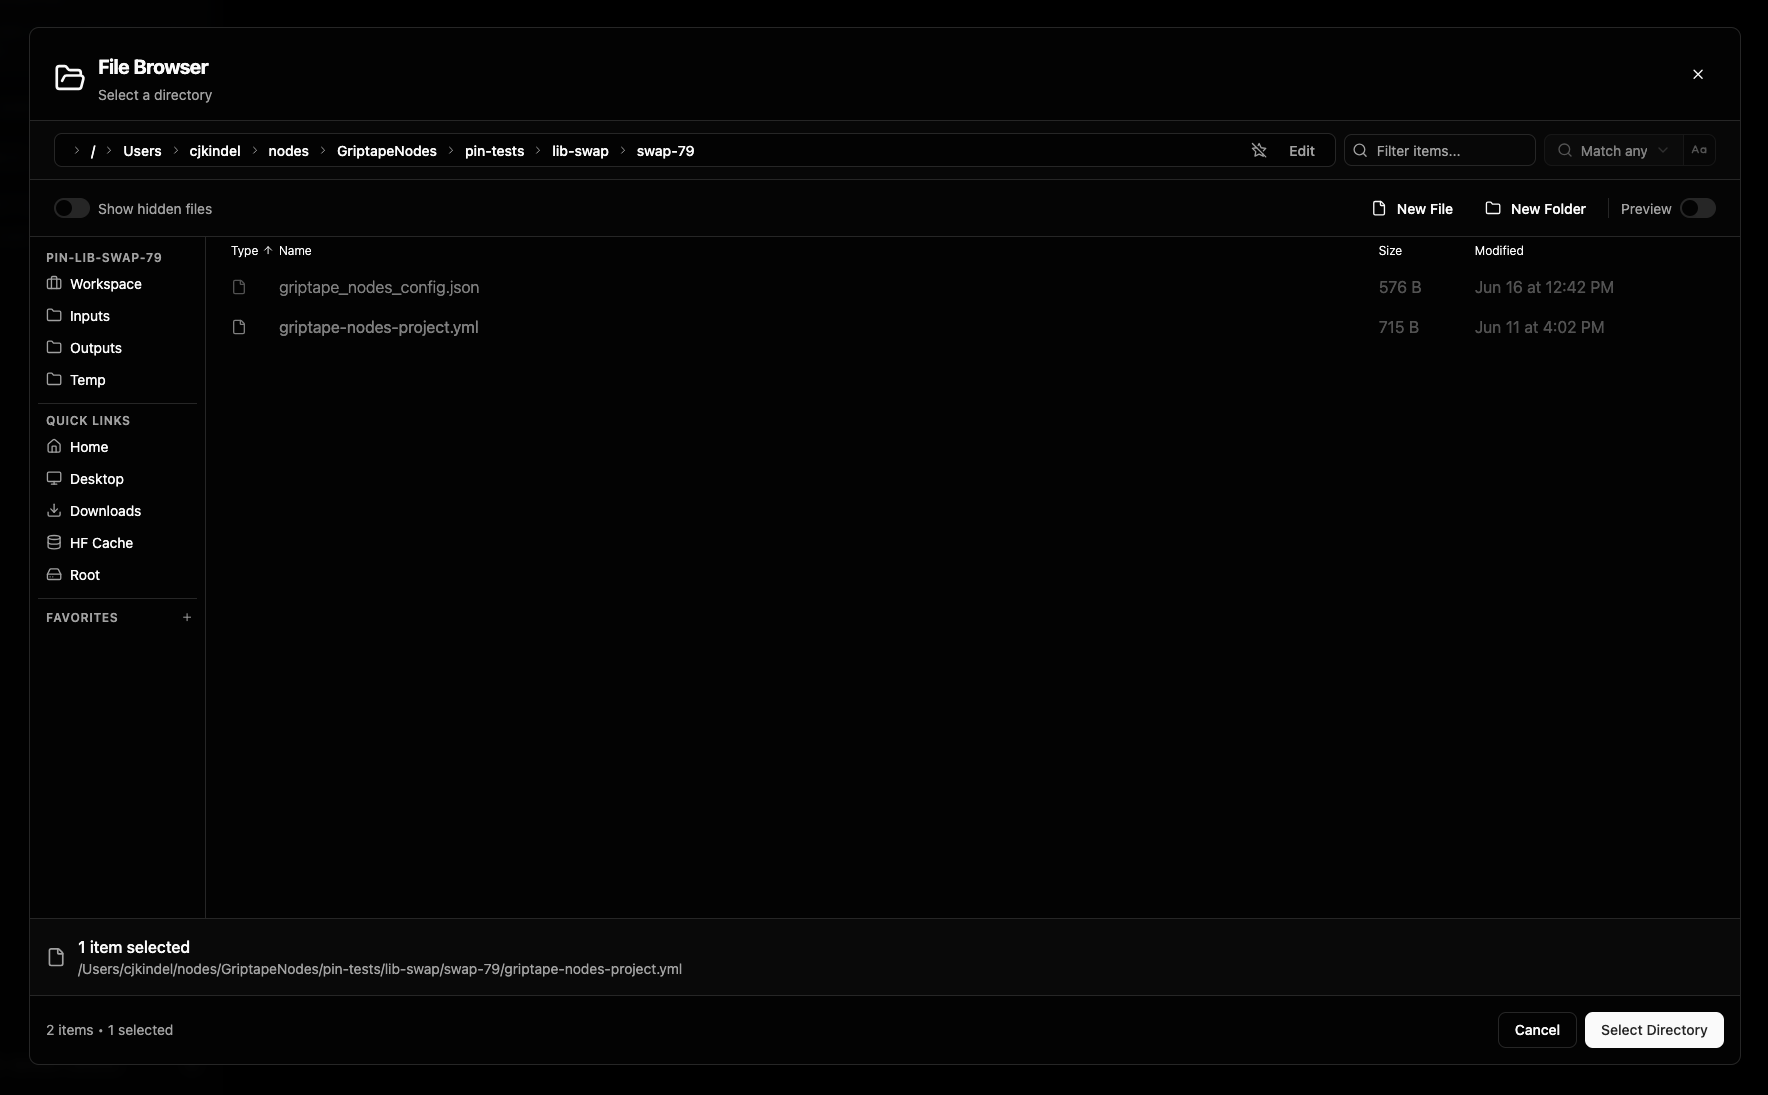
griptape-nodes-project.yml) is written. By default this is linked to the chosen location and shown as a read-only path that ends inyour-project-name/griptape-nodes-project.yml, so it updates automatically as you type the name. To set a path by hand, click the path (or the folder button to browse); a Reset link relinks it to the default.
Advanced Settings
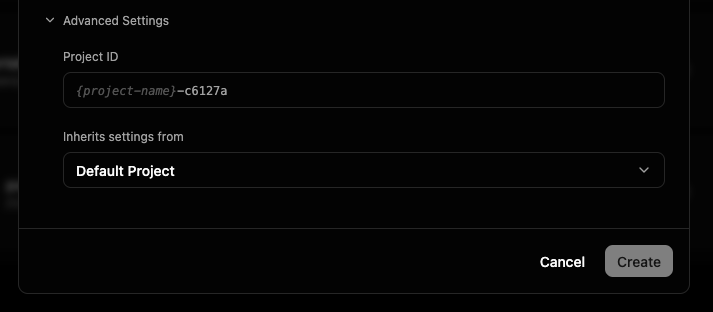
Most artists never need to open this. Expand Advanced Settings to reveal two fields:
- Project ID: a unique, permanent identifier for the project. It is generated automatically from the name plus a short random suffix, and you can leave it as-is. Click it to type your own (lowercase letters, numbers, and dashes; it must be unique). Once a project is created, its ID does not change.
- Inherits settings from: the parent project. A child project starts from its parent's setup and only stores the things you change. This is linked to the location by default, so choosing a location also sets the parent; pick Default Project here if you don't want inheritance. See Projects for how inheritance works.
Click Create. A progress panel walks through saving the project, registering it with the engine, activating it, and finishing up. Creating a project makes it the active project, so the engine reloads (the same reload that happens on any switch); if you have an unsaved workflow open, you'll be prompted to save first.
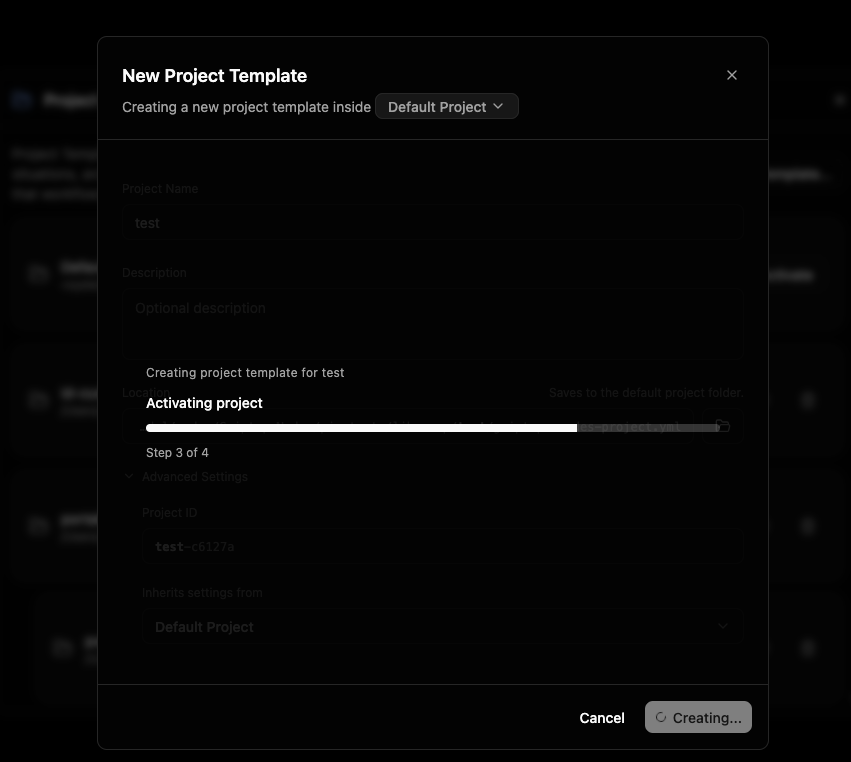
If the location or parent project pins specific library versions, the same provisioning preview shown when switching appears here so you can review and approve those libraries before the new project activates.
A Project created confirmation appears when it's ready.
Viewing and editing a project
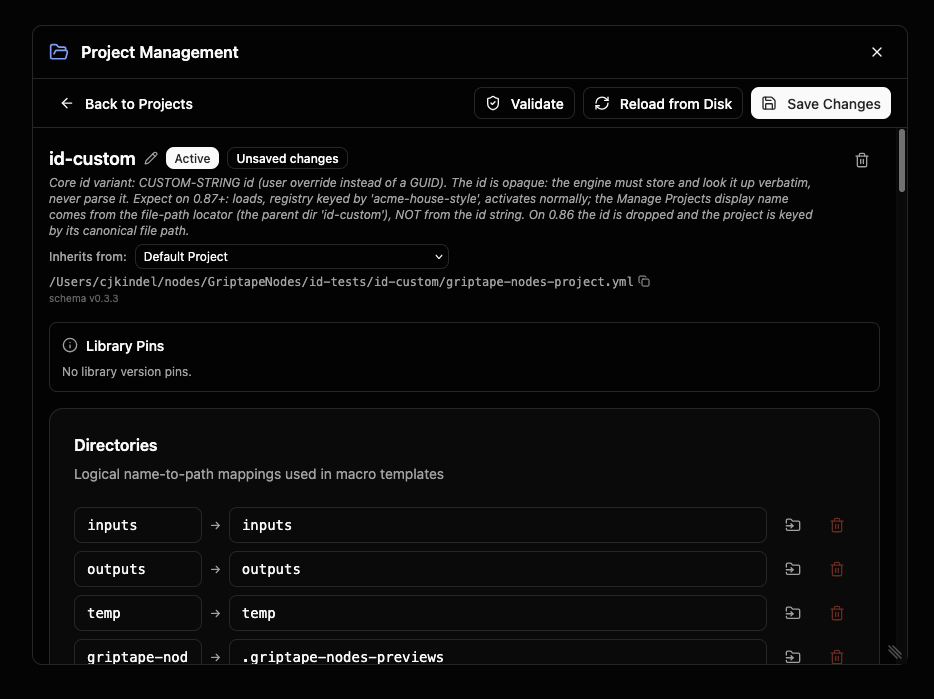
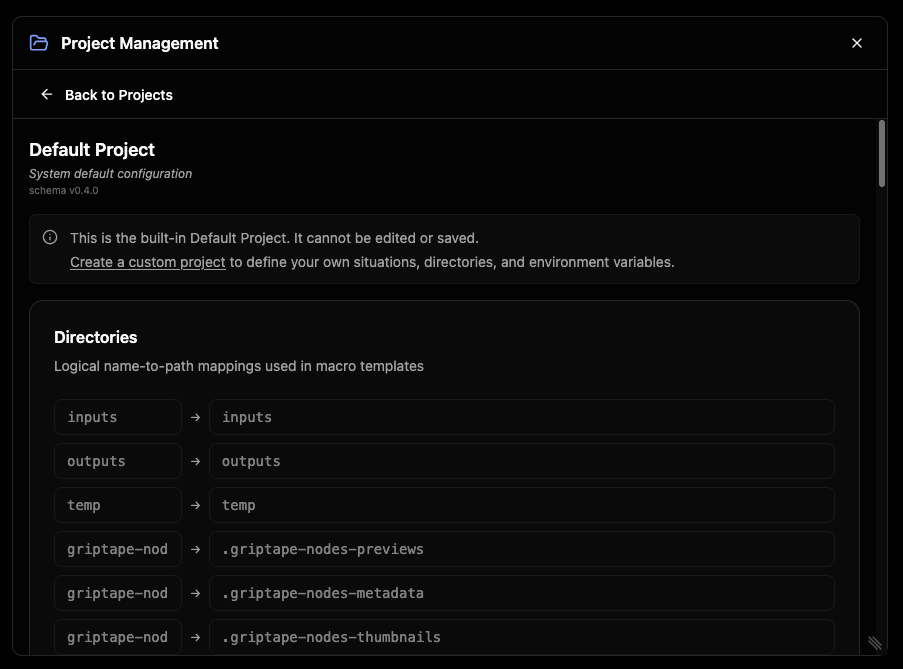
Click a project in the list to open its detail view. The header shows the project's name, its file path (with a button to copy it), and badges for Active and Unsaved changes.
Use the pencil icon next to the name to edit the name and description inline.
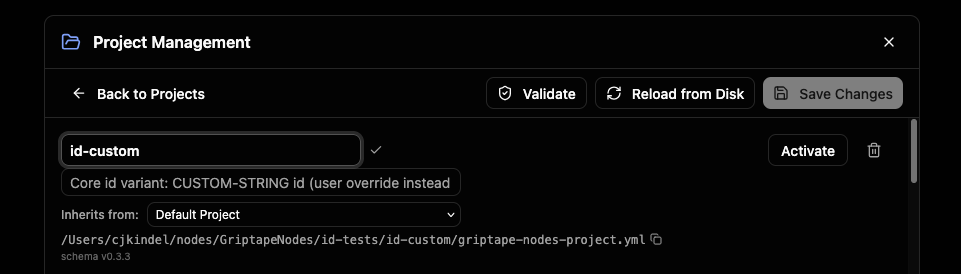
The Inherits from dropdown sets (or clears) the parent project. The detail view also surfaces the project's editable sections:
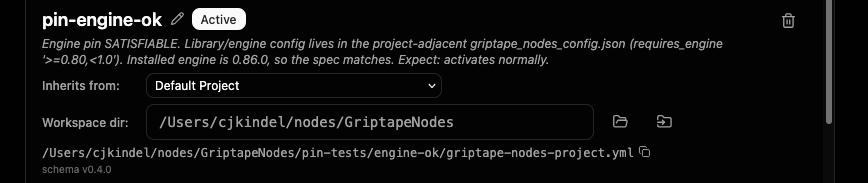
Workspace directory
The Workspace dir field sets where this project's work is rooted: the folder that relative paths, outputs, and downloads resolve against. It is the highest-priority way to choose a workspace, overriding per-user and global settings.
Leave it blank and the project uses the workspace the engine works out from your settings; when blank, the field shows that calculated path as grey placeholder text, so you can see where the project's work will land without setting anything. Type a path to pin the workspace explicitly, or use the folder button to browse for one. Like Directories, it has a per-platform toggle to give the workspace different paths on Linux, macOS, and Windows.
For the full reference, see Workspace directory and Workspace.
Directories
Directories map a short logical name (like outputs) to a real folder path. Workflows and nodes refer to the name, and the project decides where it actually points. Use Add Directory to create one, and the per-platform toggle on a row to give a directory different paths on Linux, macOS, and Windows.
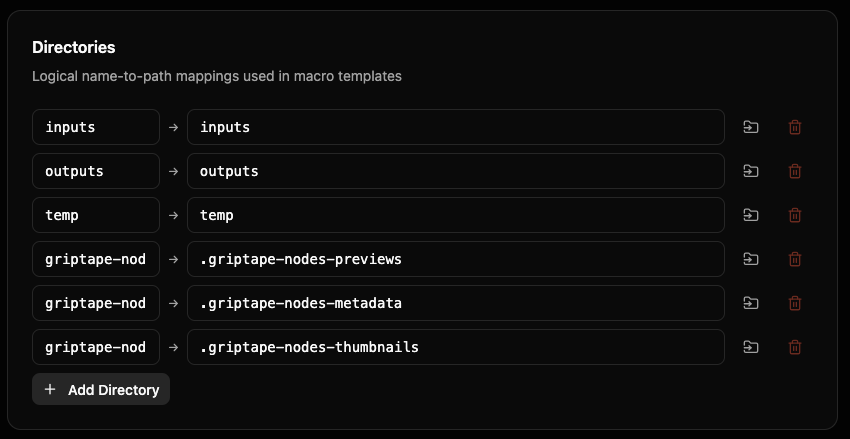

For the full reference, see Directories.
File Extension Directories
File Extension Directories route files into folders based on their extension (for example, png → images, mp4 → videos). Expand the section to add or edit mappings.
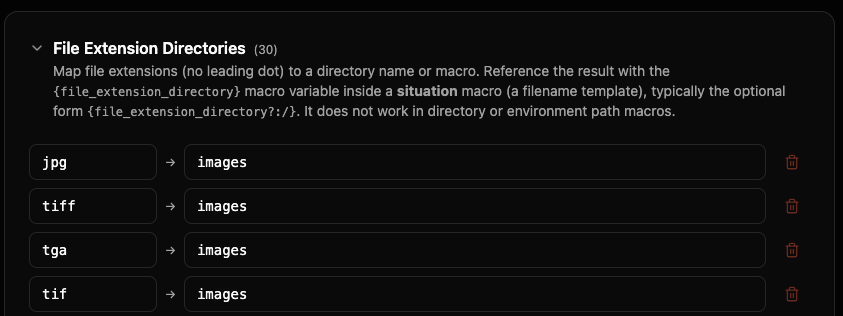
For the full reference, see File Extension Directories.
Environment
Environment is a set of custom key-value variables this project provides. You can reference them elsewhere in the project. Use Add Variable to add one.
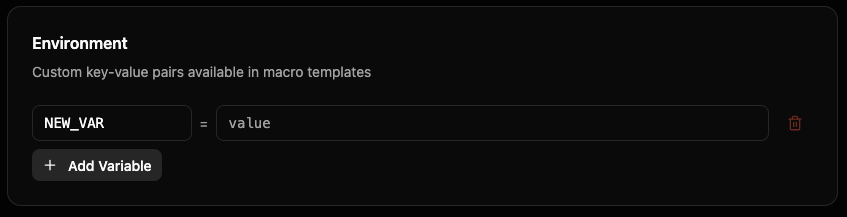
For the full reference, see Environment & Builtin Variables.
Situations
Situations are named file-saving scenarios (for example, saving a node's output, or downloading a URL). Each has a path template (a macro) and a policy for what to do if a file already exists. Use Add Situation to define one.
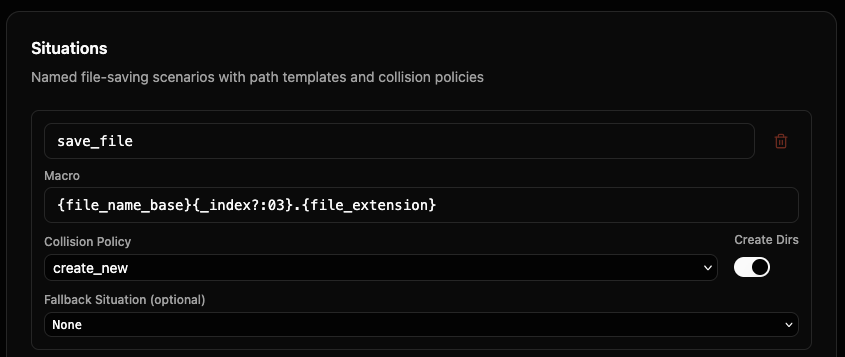
For the full reference, see Situations.
Saving, validating, and reloading
A toolbar across the top of the detail view holds the actions for the project you're editing:
- Validate: check the project for problems without saving. Issues are listed with the field and a description; a clean check reports Template is valid.
- Reload from Disk: discard your in-window edits and reload the file as it is saved on disk.
- Save Changes: write your edits back to the project file. (Enabled only when there are unsaved changes.)
- Back to Projects: return to the list. If you have unsaved changes, you'll be asked to confirm before discarding them.

If a project pins specific library versions, a Library Pins panel shows what those pins are.

Registering an existing project
If a project file already exists on disk (for example, one shared by your team), use Register Template… in the project list, browse to its griptape-nodes-project.yml, and it's added to your list. From there you can activate, view, or edit it like any other project.
Removing a project
To remove a project from your list, open it and click the trash icon (or use the trash icon on its row in the list). Confirm in the Remove Template dialog.

Removing only unregisters the project. The project file on disk is not deleted, so you can register it again later with Register Template….
Exporting and importing projects
You can package a project into a single .zip file and move it to another machine, hand it to a teammate, or keep it as a backup. The package bundles the project file along with the libraries it depends on, so the project works on the other end without manual setup.
Secret values never travel in a package. Things like API keys are referenced by name only. After importing, you set those secrets yourself in Settings; the import dialog lists exactly which ones you need.
Exporting a project
In the project list, each project has a small package icon on its row. Click it, choose a destination folder, and Griptape Nodes writes <project-name>.zip there. A confirmation appears with the path, and if the project relies on any secrets, it also lists the secret key names whoever imports the package will need to provide.

Importing a project
Click Import Project… in the top-right of the project list and pick a .zip package. Before anything is extracted, an Import project dialog shows you what's inside:
- Package: the project's original name.
- New project name (optional): rename the imported copy. Leave it blank to keep the original name. Renaming is handy for branching or duplicating a project.
- Libraries: each bundled library, tagged bundled (a full copy travels in the package) or referenced (re-downloaded on import).
- Secrets to set: any secret keys this project needs that aren't already set in your environment. Set these in Settings before running the project.

Click Choose location & import, pick the folder to extract into, and the project is registered in your list. A confirmation shows where it landed (and reminds you of any secrets to set). The imported project is added to your list but is not activated automatically; switch to it when you're ready.
The Default Project
Griptape Nodes always includes a built-in Default Project. It's read-only: you can view it, but you can't edit or save it. When you open it, a banner explains this and offers a shortcut to Create a custom project so you can define your own directories, situations, and variables.
The Default Project is also the project you're in when no other project is active.
Seeing a project's workflows
The workflow chooser only shows the workflows that belong to the project you're currently in, so switching projects also switches which workflows you see.
Where to go next
- Project overview: how the pieces fit together
- Workspace: the root working context and how relative paths resolve
- Projects: the project file format, parent projects, and the merge model
- Version Pinning: pin a project to an engine version and to specific library versions
- Macros: the template syntax used in situations and directories
- Directories, Situations, File Extension Directories, Environment & Builtin Variables